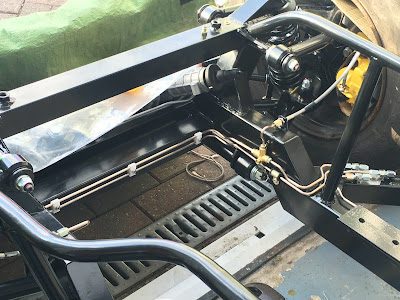
Still, after all this I am now making pretty reasonable progress and overall I am happy with the outcome so far. Just one area not quite as I wanted but this will be staying (at least for now!).
When I came to roll the chassis out a bit so I could work on the front end area I couldn't move it. Looks like one of the slave wheels has a puncture. After re-inflating it I was able to continue but will have to rectify that later.
Progress so far is as below.
 |
| Front nearside brake and clutch pipes |
 |
| Installed |
All that remains now is to add a bulkhead fitting to suit the flexible hose that goes to the clutch slave cylinder, fasten the clutch pipe approximately every 250mm (must be no more than 300mm for IVA), finish the last few bends for the rear brake pipe along the chassis rail and fasten the rear brake pipes to the chassis.
The Gen III chassis is a little more fiddly getting the pipes around the new tubular sections along either side of the transmission. It was a really good job I marked where the body sat on the chassis before I removed it as I can keep the pipe clear of the body area, Marking this out before the body is removed is pretty much essential well it certainly helps with the nerves.
When all is complete I will add a few more pictures of the finished runs so you can see where it all went. Hopefully all will be OK.


No comments:
Post a Comment