With the brake and clutch lines completes as far as I can for now the next thing was to start looking at is the fuel line. As far as I can see the normal route on an AK is to run it under the diff and then route it along the inner face of the nearside chassis rail (for Ford anyway) with the fuel filter as close to the rear as you can get as the transmission tunnel area widens just before the diff mounting plate.
I have seen many routings under the diff that are very well done with a suitable guard but this route has always bothered me as the fuel line is then the lowest thing under the car and there is a risk of grounding on the guard. I spent quite a while reading through various build blogs and eventually posted a question about this on the UK Cobra Club Forum recently. I got a few replies (thanks to all) and there was one who has done what I was hoping to do and this was Steve and he very kindly added photos of his route on
http://stevesakcobrabuild.blogspot.com, Nov 2015. This means that the fuel pipe is then completely within the height of the chassis and pretty much fully protected (the only area on minor concern is at the fuel outlet from the tank. May still need a much smaller guard here!). I will be able to secure the pipe by using either one of the diff cover bolts or the tie bar bolt adding a small bracket and then also adjacent to the diff with a clamp on top of the chassis rail.
I've realised that this does mean however that I will have to re-do the nearside rear brake pipe but no worries, this is just a short length.
Anyway The first thing I decided to do was to sort the position of the fuel filter. This will be on a small bracket bolted to the chassis. The bracket is slightly angled to help the 'run' of the pipe.
 |
| Filter and stainless bracket |
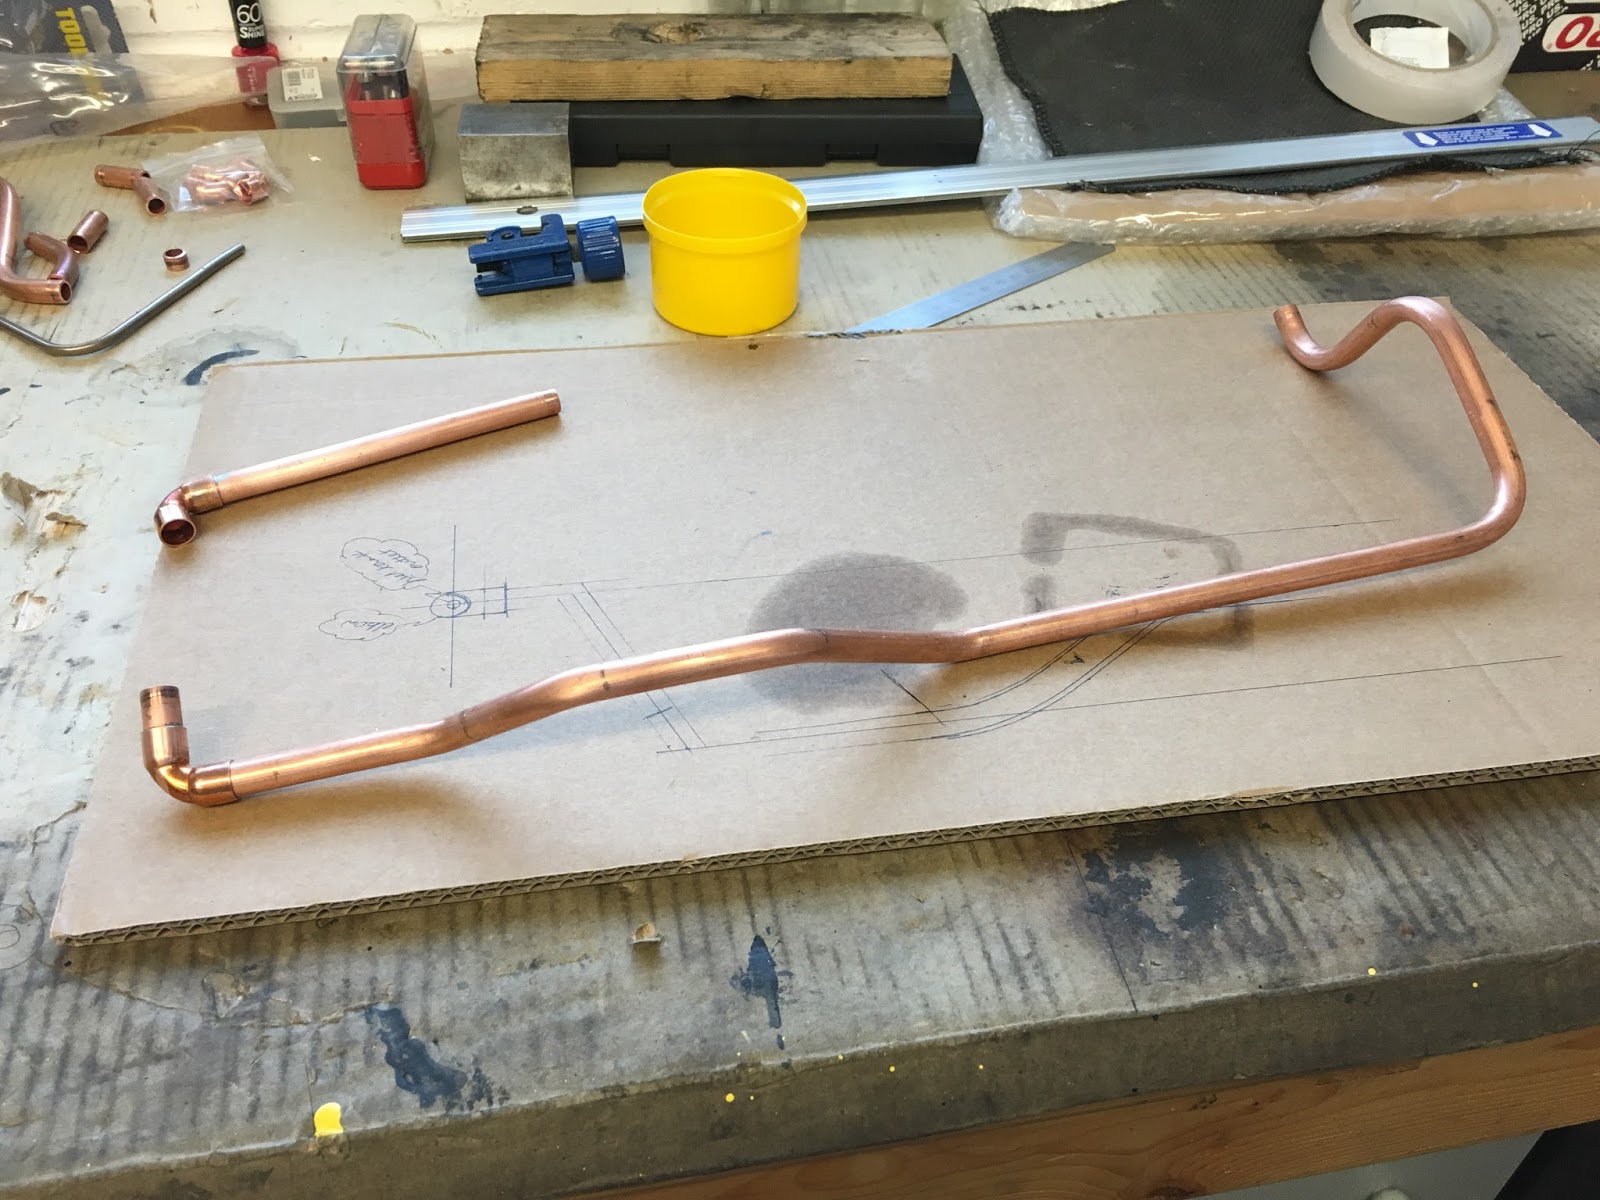
For the part from the tank to the filter I'm using 10mm copper pipe. The route is pretty tortuous but actually proved quite satisfying when all bent to shape although it took several goes to get it right (including the kinked one!! last but one bend). The copper pipe is supplied 'coiled' so has to be straightened by hand! This a slow laborious process unless you purchase yet another pipe straightener but I'm not going to spend the money on that! Hopefully I shan't need to do it again (but I did!!!)
 |
| Version 2 finished & ready for soldering so I thought! |
 |
| Kinked! Last but one bend. Another opportunity! |
 |
| Version 3 ready for last bits to be soldered |
 |
| 3mm stainless bracket to fix to tie-bar bolt |
 |
| From tank past tie-bar to bracket |
 |
| Under diff body well away from the drive shaft flange |
 |
| Painted and ready for fitting |
The pipe from the tank will be fitted when I have sorted fuel sender and when the tank is flushed and finally fitted permanently (at least that is the plan).
I have now run the braided hose from the filter up to the engine mount area. Still need to determine exactly where this needs to be fastened for the pump in my case an Edelbrock Performer RPM Street Fuel Pump 110gph mechanical unit (EDL 1725).
 |
| Braided hose run so far |