Needed a bit of help from my neighbour Roger (big thank you as this saved my back at least a little!) to lift the block off of its stand to allow me to fit the cam plug and the oil gallery plugs at the clutch end.
Just a small note... Don't forget to add the smaller plug on top of the block (shown top right) else there could be a big problem. I only realised this as I had a spare plug left over on my bench after I thought I had finished. More help neded to get the block back on its stand.
The next task was to install the camshaft. As mentioned earlier I am using a COMP CAMS Extreme Energy camshaft. I temporarily attached the large timing chain sprocket after sorting out which dowel was needed to use as a handle when carefully sliding the cam into all its bores making sure that I didn't score the shiney new cam bearings with the cam lobes.
I gave all the lobes and bearings a good coat of Graphogen lube as this will probably not be run for a while yet. I also assed some good old Clevitte assembly lube for good measure. Maybe overkill but I would rather have too much lube than not enough.
After the cam was installed along with its thrust plate with screws thread locked and the thrust plate lubricated I moved on to the installation of the crankshaft.
As per the cam every journal was cleaned and then graphogen added to all bearing surfaces. The bearing shells were then added to the block and the crank very carefully lowered into place. The main caps then had their bearing shells added and all mains were then placed in their correct position and their bolts (now ARP) were loosely screwed in place.
 |
| Some of the mains bolts ready to fit |
 |
| Crank placed and main caps loose. |
At this point I should mention that as I am using ARP bolts specifically these come with their own assembly lube. Ensure that all threade are liberally coated as well as the the underside of the bolts and also the washers. This is essential in setting the corect torque on each bolt.
One thing I forgot to mention and photograhp was the rear seal installation. I am using a Felpro single piece rear seal. It is recommended that this has a small amount og silicone/rtv gasket compound between the outer seal diameter and mating surface. I lubricated the seal journal diameter on the crankshaft and carefully slid the seal onto this making sure that it was the correct way round and also after allpying sealant to the lower half of the seal OD. Once seated corectlyI added a little more sealant to the upper part of the seal OD and assembled the main bearing cap seating this down correctly into its location on the block. I spent a little while cleaning excess sealant to leave a clean and tidy job. Finally after checking that all was properly lubed and located I followed the ARP instructions in torquing the crankshaft caps in place, in the specified sequence and in 3 stages of increasing torque until the specified value of 70 ft/lbs. These were then left and checked again some time later. I had to keep repositioning myself to stop the stand moving whilst torquing the bolts but all worked out OK in the end.
 |
| Crank and cam fully installed. |
Next, gapping the rings. It took me quite a while of searching and reading before I was certain which ring was the top ring and which was the second. The top rings (in my set - Sealed Power) have a shiney outer diameter and the second are all cast iron grey. They are colour coded but no info was given to the coding! Both have assembly marks to orient top on assembly. The mark on the second ring is incredibly small. Whilst gapping them I made sure that each was in its correct bore, correct orientation and totally parallel with the engine deck but about a cm below the surface. Filing by hand is a slow and painful process (my thumb is still numb after 3 days!).
 |
| Complete set of Sealed Power (Federal Mogul) 4.03" Piston rings. Top LH support rings, top middle & top RH - Oil rings, lower LH - second rings, lower RH - top rings, |
 |
| Top ring identification mark |
 |
| Second ring identification mark. Can you see it! |
Recommended gaps are as follows:-
Top ring 0.016" - 0.018";
Second ring 0.020" - 0.022";
Oil rings 0.015" - 0.055";
The oil rings didn't need filing as they were all within tolerance.
One word of warning!!!! Be absoultely certian you don't have 2 feeler gauges stuck together when checking the gaps. I did on ring 15 out of 16 and it cost me a new set of rings!!

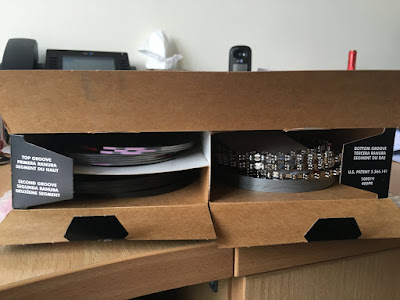
The new box of piston rings have arrived this morning so I can complete the gapping now (when I find a little time). Just got loads of spare rings that hopefully I won't need. One thing to note is that all rings are all very clearly marked on the box. I completely missed this first time round. At least what I found on the search ties in with info on the box.

Next was piston assembly (less rings). This entailed cleaning everything throughly again and getting clear in my mind the corect orientation of postons and con-rods. That sorted I began with cylinders 1 thro 4 as the orientation of the pistons and rods are the same for each bank of four.
On the con-rods there are 2 chamfers where the bearing shells fit. The larger chamfer fits, or rather clears the large radius on the crank journal else the con-rods will not fit!
My pistons have full floating pins which have coiled wire locking rings. These are a complete pain to fit. I've lost count of the little cuts and scratches I got when putting these in. You have to 'stretch' them before you start, feed the first loop into the groove and slowly push the rest into the groove with a small flat screwdriver. There is a real knack to this and it got very much easier after the first dozen or so!!.

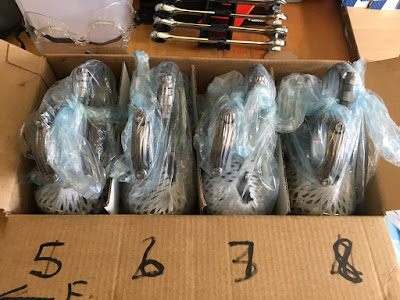
Lastly (at least for now) came the assembly of the rings onto the pistons. At this point every piston became bore specific and it is essential to keep them all carefully numbered so that the right piston/ring assembly goes in the correct bore. I numbered the box the pistons came in to make indetification easier when I come to assemble them into the block.

Cleaned, oiled, assembled, bagged and boxed awaiting final assembly into the block. I attemped the first piston assembly into the block at the weekend but gave up pretty much instantly as the rubbish ring compressor from good old eBay gashed my hang so it went in the bin. I have a 'tapered sleeve' ono order from Stateside Autos in Nuneaton. Should be here on the 23rd all going well. So that is about it for now.
And yes I got the numbers on the box the wrong way round!


No comments:
Post a Comment